
© Original recipe by The Daily Dishboard ©
🍪✨ Chewy Chocolate Thumbprint Cookies: The Ultimate Fudgy Dessert Experience!
1. Introduction
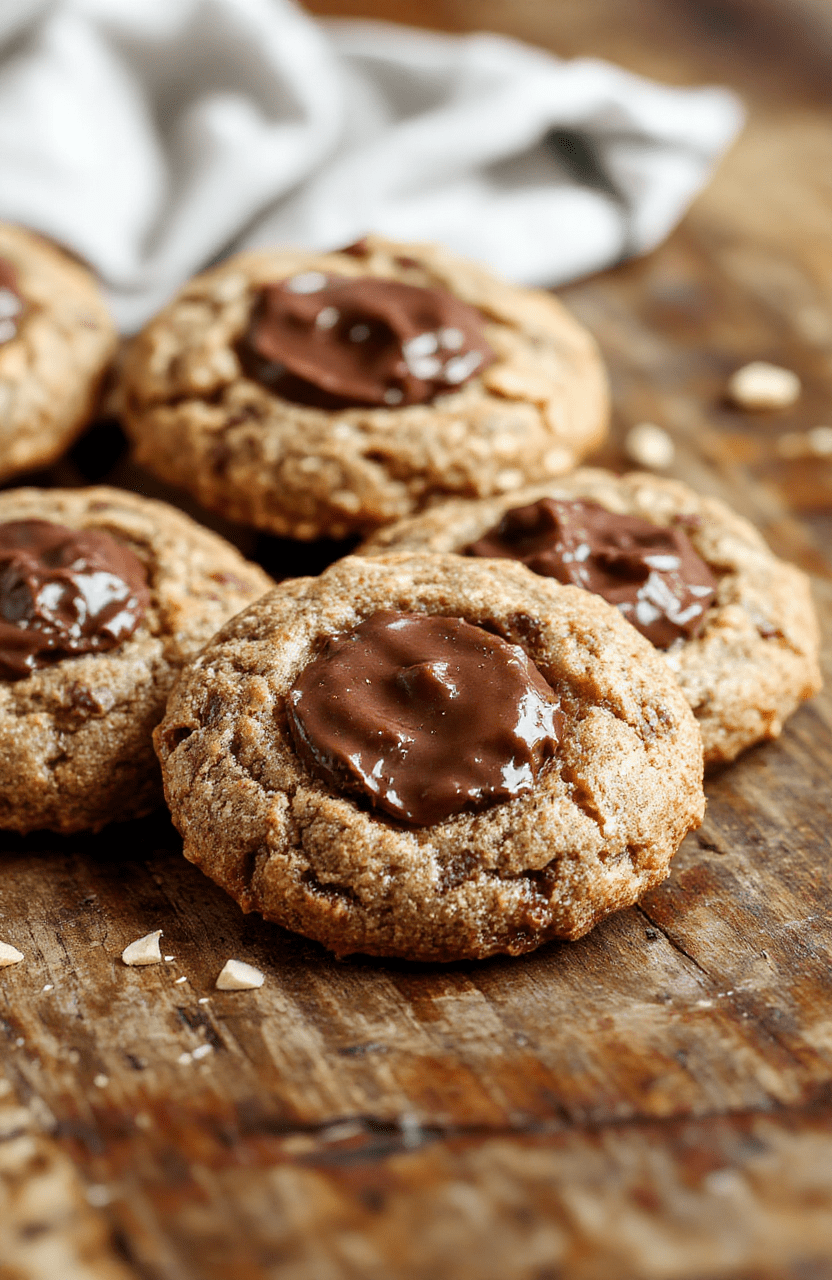
If you’re craving a rich, fudgy treat that’s irresistibly chewy and visually delightful, then these chewy chocolate thumbprint cookies are exactly what you need. With their crisp outer shell giving way to a soft, chocolatey center, these thumbprint treats are perfect for any occasion—from casual afternoons to festive celebrations. Their eye-catching swirl of melted chocolate nestled in a perfectly formed thumbprint makes each bite as pleasing to the eye as it is to the palate. Get ready to elevate your dessert game with this simple yet decadent recipe!
2. Why You’ll Love This Recipe
- Ready in 30 mins: This quick recipe doesn’t require long prep or wait times.
- One-bowl simplicity: Minimal equipment needed—perfect for busy bakers!
- Rich, fudgy flavor: Deep chocolate taste that satisfies every sweet tooth.
- Chewy texture: The ideal chewiness paired with a slightly crisp exterior.
- Versatile & customizable: Perfect for customizing with different toppings or fillings.
3. Ingredient Notes
To achieve the best flavor and texture, selecting high-quality ingredients is crucial. Use premium cocoa powder for a deep, rich chocolate notes that stand out. For the butter, opt for unsalted, European-style if possible—this enhances the overall flavor and contributes to better texture.
When it comes to sweetness, a good quality granulated sugar ensures proper caramelization in the crust. For a more indulgent result, consider using an electric mixer like the KitchenAid Artisan Stand Mixer to blend ingredients thoroughly and achieve a smooth, glossy dough. For the chocolate filling, use a high-quality semi-sweet or dark chocolate — this creates the luscious, fudgy center that’s the hallmark of this treat.
4. Kitchen Tools You Need
- Compact 6-in-1 Digital Air Fryer: Great for quickly baking cookies without heating up the oven.
- T-fal 14-Piece Hard Anodized Nonstick Cookware Set: Ensures even heat distribution for perfect cookies every time.
- Ninja Foodi Smart XL Indoor Grill & Air Fryer Combo: Ideal for baking or melting chocolate toppings with precision.
- EUHOMY Portable Rapid Ice Maker: Perfect to serve cookies chilled or with a cold glass of milk.
5. How to Make Chewy Chocolate Thumbprint Cookies
Prepare the dough
Begin by preheating your oven to 350°F (175°C) and lining a baking sheet with parchment paper. In a mixing bowl, combine softened unsalted butter and sugar until the mixture is light and fluffy—this usually takes about 2 minutes with an electric mixer. Add in vanilla extract and a beaten egg, followed by your sifted cocoa powder, flour, and a pinch of salt. The dough should be soft but manageable. Wrap it in plastic wrap and chill for about 15 minutes for easier handling.
Form the thumbprints
Roll tablespoon-sized portions of dough into balls and place them on your prepared baking sheet. Using your thumb or the back of a rounded teaspoon, gently press into the center of each ball, creating a well. The edges should be slightly thicker and rise evenly as they bake. The aroma of rich, chocolaty dough will fill your kitchen!
Bake and add the chocolate center
Bake in the preheated oven for 10-12 minutes. The cookies should be set and slightly cracked on top but still soft inside. Remove from oven and immediately fill the indents with melted semi-sweet chocolate. For a smooth, shiny finish, allow the chocolate to set at room temperature or refrigerate for 10 minutes if you prefer a quicker result.
6. Expert Tips for Success
For perfect chewy cookies, do not overbake. Remove them when they look slightly underdone—they will firm up as they cool. When filling with chocolate, use a piping bag or teaspoon for precision. To enhance chewiness, let the cookies rest for at least 30 minutes before serving. Always measure your ingredients accurately for consistent results. For a more decadent touch, sprinkle flaky sea salt on top of the molten chocolate before it cools.
7. Variations & Substitutions
- Vegan option: Substitute butter with coconut oil and use dairy-free chocolate.
- Nutty twist: Add chopped hazelnuts or almonds into the dough for added crunch.
- White chocolate version: Fill the thumbprints with melted white chocolate for a different flavor profile.
8. Storage & Reheating
Keep these fudgy thumbprint cookies in an airtight container at room temperature for up to 3 days. For longer storage, refrigerate for up to a week or freeze for 1 month. Reheat in a preheated oven at 300°F (150°C) for about 5 minutes to bring back their chewy texture and melt the chocolate slightly for that fresh-baked experience.
9. FAQ
Can I make these cookies gluten-free?
Yes, substitute all-purpose flour with a gluten-free baking flour blend. Be sure to check that your chosen blend contains xanthan gum or add a teaspoon to ensure proper binding.
How do I prevent the cookies from spreading too much?
Chill the dough for at least 15 minutes before baking. This minimizes spreading and helps maintain their thumbprint shape.
Can I freeze the dough beforehand?
Absolutely! Roll the dough into balls, freeze on a tray, then transfer to a plastic bag. Bake from frozen, adding an extra 2-3 minutes to the baking time.
Are these cookies suitable for kids?
Yes, especially if using dairy-free chocolate or reducing sugar, making them a great treat for children with dietary restrictions.
10. Conclusion
These chewy chocolate thumbprint cookies combine the irresistible appeal of fudgy, chocolatey goodness with a playful, eye-catching presentation. Their melt-in-your-mouth texture makes them a standout dessert that’s surprisingly easy to whip up. Whether served at a party or enjoyed with a glass of milk on a cozy evening, these treats are sure to become a new favorite. Happy baking!
Print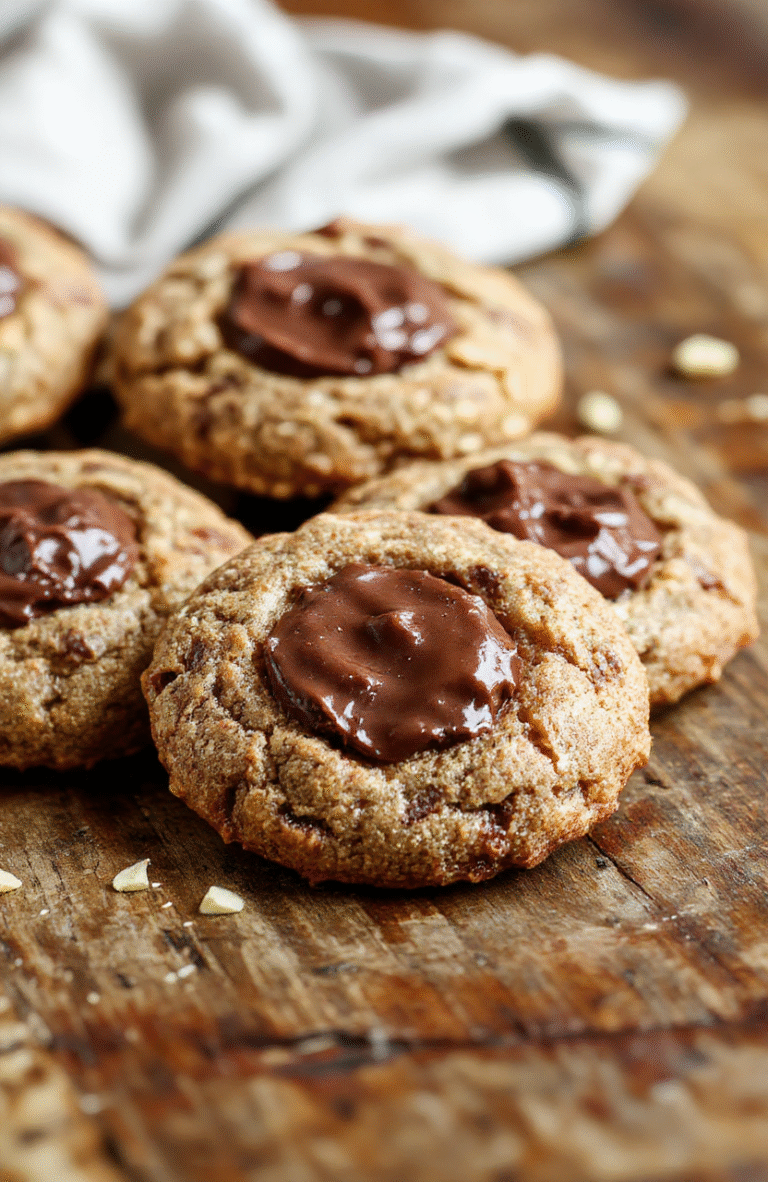
Chewy Chocolate Thumbprint Cookies Easy Fudgy Dessert
A simple, fudgy chocolate cookie with a gooey center that melts in your mouth, perfect for snacking or sharing with friends.
- Total Time: 27 minutes
- Yield: 18 cookies
Ingredients
- 1 cup all-purpose flour
- 1/2 cup unsweetened cocoa powder
- 1/2 teaspoon baking powder
- 1/4 teaspoon salt
- 1/2 cup unsalted butter, softened
- 3/4 cup granulated sugar
- 1 large egg
- 1 teaspoon vanilla extract
- 1/2 cup chocolate chips or chunks
- 1/4 cup heavy cream
Instructions
- Preheat oven to 350°F (175°C). Line a baking sheet with parchment paper.
- In a bowl, whisk together flour, cocoa powder, baking powder, and salt.
- In a separate large bowl, cream butter and sugar until light and fluffy. Beat in egg and vanilla.
- Gradually add dry ingredients to wet mixture, mixing until combined.
- Form dough into 1-inch balls and place on the prepared baking sheet.
- Use your thumb or a small spoon to make an indentation in the center of each cookie.
- Fill each indentation with a small spoonful of chocolate chips or chunks mixed with cream to make a smooth filling.
- Bake for 10-12 minutes until cookies are set but still fudgy inside.
- Allow cookies to cool slightly before transferring to a wire rack to cool completely.
Notes
- For extra chocolate flavor, add a sprinkle of sea salt on top before baking.
- Store in an airtight container for up to 3 days for best freshness.
- Prep Time: 15 minutes
- Cook Time: 12 minutes
- Method: Bake
- Cuisine: American
- Diet: Vegetarian
Nutrition
- Serving Size: 1 cookie
- Calories: 150 Kcal
- Sugar: 12g
- Sodium: 30mg
- Fat: 8g
- Saturated Fat: 5g
- Unsaturated Fat: 3g
- Trans Fat: 0g
- Carbohydrates: 18g
- Fiber: 2g
- Protein: 2g
- Cholesterol: 10mg